Intro: The Art of Aging and Battle Damage
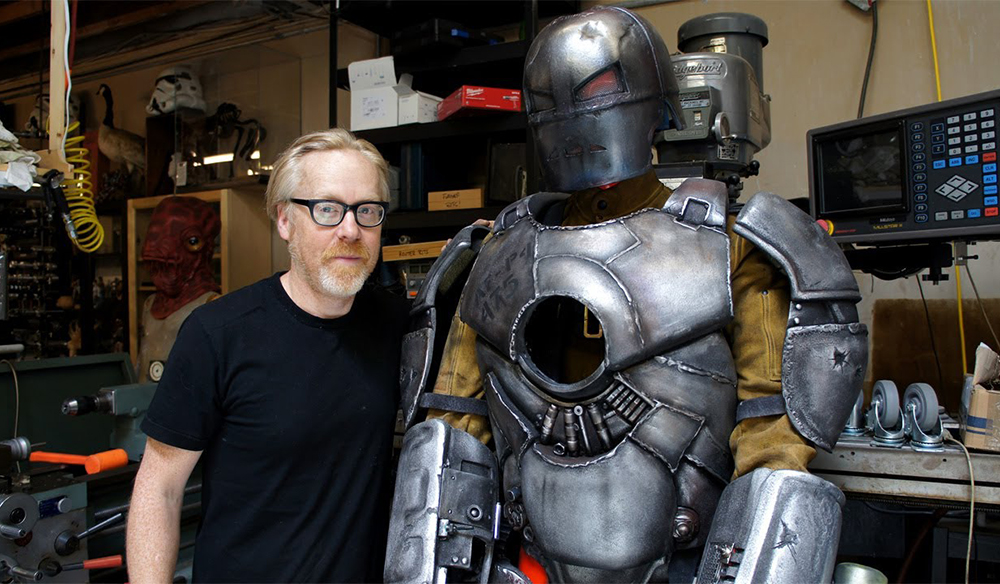
“Weathering” is the technique of making new props and armor look old, worn, and battle-damaged rather than pristine and freshly manufactured. This crucial skill can be the difference between a good cosplay and a great one, transforming clean, obviously new pieces into authentic-looking artifacts that appear to have genuine history and character.
Many beginning cosplayers focus heavily on creating clean, perfect pieces but overlook the importance of weathering in achieving authentic character representation. However, most characters in fiction don’t carry brand-new, untouched equipment – they use items that show signs of wear from regular use, environmental exposure, and combat damage. Understanding how to apply weathering techniques effectively can elevate your cosplay craftsmanship to professional levels while adding depth and realism to your costume presentation.
The Story of Your Prop: Understanding Wear Patterns
Effective weathering begins with understanding the fictional history of your character’s equipment. Every scratch, dent, and discoloration should tell a story about how the item has been used, where it’s been carried, and what it’s experienced. This narrative approach to weathering creates cohesive, believable aging that enhances rather than detracts from your overall cosplay presentation.
Developing Your Item’s Backstory
Developing Your Item’s Backstory
Before applying any weathering techniques, consider the fictional journey your prop or armor piece has taken. Understanding how and where your character uses their equipment helps determine which areas should show wear and what types of damage would be most appropriate for the item’s history.
Key backstory elements to consider:
- How long has the character owned this item?
- What environments has it been exposed to (desert, jungle, city, space)?
- How frequently is it used in combat or other stressful situations?
- Has it been repaired or modified during its fictional history?
- What materials is it supposedly made from in the source material?
For example, a knight’s sword that has seen years of campaign service would show different wear patterns than a ceremonial blade that’s only used for special occasions. The campaign sword might have scratches along the blade from deflecting other weapons, worn grips from constant handling, and discolored areas from exposure to rain and mud. The ceremonial blade would likely show minimal wear but might have tarnished metal elements and faded decorative details.
Pro Tip:
Study reference images from your source material carefully, paying attention to how different materials age and show wear in the fictional universe. Science fiction settings might feature different weathering patterns than fantasy worlds, and modern military equipment weathers differently than ancient armor. This attention to setting-appropriate weathering adds authenticity to your cosplay.
Identifying High-Wear Areas
Identifying High-Wear Areas
Realistic weathering requires understanding which parts of any item would naturally show the most wear and damage. These high-wear areas should receive the most attention in your weathering process, while protected areas remain relatively untouched to maintain the contrast that makes weathering effective.
Common high-wear areas include:
- Gripping surfaces and hand-contact points
- Blade edges and cutting surfaces
- Joint connections and moving parts
- Impact zones and protective elements
- Exposed surfaces subject to environmental exposure
For armor pieces, areas that would contact other armor, weapons, or environmental surfaces during combat or movement should show appropriate wear. For weapons, the cutting edge, guard, and grip areas typically show the most use. Tools and utility items often display wear patterns that reflect their specific functions and handling characteristics.
Basic Technique: The Black Wash
The black wash is one of the most fundamental and versatile weathering techniques in a cosplayer’s arsenal. This simple but effective method uses diluted black paint to create shadows and grime in the recessed areas of props and armor, instantly adding depth and realism to otherwise flat, clean surfaces.
Preparing Your Wash Solution
Preparing Your Wash Solution
Creating an effective black wash requires balancing paint opacity with fluidity to achieve the right consistency for flowing into crevices without pooling in unwanted areas. The ideal wash should be thin enough to flow easily but concentrated enough to create visible shadows where it collects.
Wash preparation steps:
- Select a matte black acrylic paint for best results
- Mix paint with water in a 1:3 to 1:5 ratio
- Add a drop of dish soap to improve flow (optional)
- Test consistency on a scrap piece first
- Adjust ratios as needed for your specific paint
The exact ratio depends on your paint’s thickness and the level of weathering you want to achieve. Thicker washes create more dramatic shadows but are harder to control, while thinner washes provide subtle aging that works well for items with minimal wear.
Application and Cleanup
Application and Cleanup
Proper application technique ensures that your black wash enhances rather than overwhelms your piece, creating natural-looking shadows that add depth and dimension to your work. The key is applying the wash generously enough to flow into all recessed areas while removing excess before it dries in unwanted locations.
Application process:
- Ensure your base coat is completely dry
- Apply wash generously with a large brush
- Tilt and rotate the piece to help wash flow into crevices
- Immediately wipe away excess from raised surfaces
- Allow wash to dry completely in recessed areas
- Gently remove any dried wash from high points if needed
Work quickly during the application phase, as you’ll have only a few minutes to achieve the desired effect before the wash begins to set. A damp cloth or paper towel works well for removing excess wash from raised surfaces, while a dry brush can help distribute any remaining wet wash for even coverage.
Pro Tip:
For more controlled application, use a cosmetic sponge or stippling brush to dab wash into specific areas rather than flooding the entire piece. This technique works especially well for targeting specific wear patterns or adding grime to particular sections without affecting the overall appearance of your piece.
Advanced Technique: Dry Brushing
Dry brushing is a technique that creates highlights and texture on raised surfaces, simulating the worn, scratched appearance of metal and other materials that have been exposed to use and environmental factors. This method is particularly effective for creating the look of scratched or abraded surfaces that reveal underlying materials or base colors.
Preparing Your Dry Brush
Preparing Your Dry Brush
Successful dry brushing requires a brush that’s properly prepared with just enough paint to create highlights without transferring wet paint to recessed areas. The technique relies on the brush’s texture and minimal paint to create subtle, realistic wear effects on raised surfaces.
Brush preparation steps:
- Select a stiff-bristled brush (natural bristles work best)
- Dip brush lightly into paint
- Remove most paint by wiping on paper towel
- Test on scrap material until desired effect is achieved
- Keep brush relatively dry throughout the process
The key to effective dry brushing is using as little paint as possible – when done correctly, the brush should appear almost dry but still leave visible highlights on raised surfaces. Too much paint will create muddy, unrealistic effects that don’t accurately represent natural wear patterns.
Executing the Dry Brush Technique
Executing the Dry Brush Technique
The dry brushing motion itself requires a light touch and understanding of how natural wear would affect your specific item. The technique works best when applied in the direction of natural wear patterns rather than randomly across surfaces.
Dry brushing process:
- Hold brush at a shallow angle to the surface
- Use quick, light strokes across raised areas
- Focus on edges, corners, and high-wear zones
- Build up effect gradually with multiple light passes
- Vary pressure and direction for natural appearance
For metal items, dry brushing with silver or metallic paint can simulate the appearance of worn plating that reveals the underlying metal. For painted surfaces, using a lighter or contrasting color can create the effect of paint wear that exposes the base material underneath. The technique works on almost any surface material and can be combined with other weathering methods for complex, layered effects.
Creating Battle Damage: Safe Techniques for Realistic Effects
For characters who have seen significant combat or conflict, creating realistic battle damage can add dramatic impact to your cosplay props and armor. These techniques require careful attention to safety and material compatibility, but when executed properly, they can transform clean pieces into convincing battle-worn equipment.
Safe Cutting and Scratching Techniques
Safe Cutting and Scratching Techniques
Creating cuts, scratches, and other damage effects requires sharp tools and careful technique to achieve realistic results without compromising safety or structural integrity. The key is understanding how different types of damage would naturally occur and replicating those patterns with appropriate tools.
Safe damage creation methods:
- Use craft knives with fresh, sharp blades for clean cuts
- Make shallow scratches with fine-grit sandpaper
- Create impact marks with ball-peen hammers (lightly)
- Use Dremel tools with cutting wheels for precise damage
- Always wear safety glasses and work in ventilated areas
When creating cuts or tears, consider how the material would naturally fail under stress. Fabric might tear along weave lines, while armor might show cuts that follow the path of a blade deflection. Impact damage often creates radiating crack patterns or dents that deform the material rather than cutting completely through it.
Adding Depth and Dimension to Damage
Adding Depth and Dimension to Damage
Realistic damage effects benefit from multiple techniques that create visual depth and suggest the force that created the damage. Combining physical damage with paint effects and weathering creates convincing results that look authentic from multiple viewing angles.
Layering techniques for damage effects:
- Create physical damage with tools first
- Apply black wash to damage areas for shadow depth
- Dry brush raised edges of cuts with contrasting colors
- Add rust or corrosion effects around metal damage
- Weather surrounding areas to show impact effects
For example, a sword cut in armor might start with a careful scratch or gouge created with a craft knife, followed by a black wash to emphasize the depth of the cut, dry brushing with metallic paint on the raised edges to simulate metal displacement, and additional weathering around the impact point to show how the force affected the surrounding material.
Safety Reminder:
Always test damage techniques on scrap material first, and never use excessive force that could cause tools to slip or materials to break unpredictably. When using power tools, secure your workpiece firmly and keep your hands clear of cutting paths. For extensive damage work, consider wearing work gloves to protect your hands from sharp edges.
Conclusion: Less is Often More
Mastering weathering techniques requires patience, practice, and a willingness to experiment with different methods and combinations. The most effective weathering often goes unnoticed by viewers who simply perceive the piece as authentically aged, which is exactly the goal of skilled weathering application.
Remember that restraint is often more effective than over-application in weathering. Subtle aging effects that support your character’s story are generally more effective than heavy-handed attempts to make everything look ancient. Start with light applications and build up gradually, checking your progress frequently to ensure you’re achieving the desired effect without overwhelming the base piece.
Consider attending one of our community’s weathering workshops, where experienced members demonstrate advanced techniques and provide hands-on guidance for developing your skills. These sessions offer valuable opportunities to practice techniques in a supportive environment while learning from others’ approaches and problem-solving strategies.
As you develop your weathering skills, remember that these techniques apply to more than just cosplay props and armor. The same principles can enhance dioramas, display pieces, and even home decor projects, making weathering a versatile skill that extends far beyond the cosplay community. The attention to detail and understanding of material aging that you develop through cosplay weathering will serve you well in any creative endeavor that involves making new items look authentically aged or worn.
Most importantly, have fun with the process of bringing fictional history to life through your weathering work. Each scratch, dent, and discoloration you add tells part of your character’s story and contributes to the overall authenticity of your cosplay presentation. This attention to narrative detail is what separates exceptional cosplay craftsmanship from merely competent construction.
